Overview- learn about increasing the length of throw by exerting force over a longer period, by the use of legs and body as well as the transference of speed by adding a short run up.
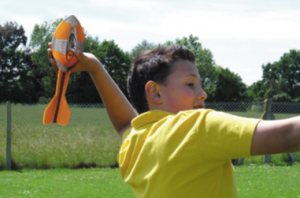
- In twos, stand opposite each other approximately 5m apart. They hold the vortex as illustrated in the photo, using a dart type throw to pass the implement to each other.

- After two throws each they take one step back until they can no longer catch the vortex.
- This time start with the vortex drawn back as far behind the head as possible. Continue to step back after 2 successful catches.
- Now as the throwing arm is pulled back, also take a step back, taking some body weight with it (ie right throwing arm, right leg back: left throwing arm, left leg back). Now push forward from that leg so that effort travels upwards into the trunk and then, lastly, into the arm. As they throw they push the body weight over the front leg. The students continue throwing until they can no-longer catch the vortex.
- To add a short run-up, the students start with the throwing leg forward. Then take three rhythmic steps into the throwing position. The run up and the throw should combine together smoothly. They should be able to achieve an even better throw.
See instructional video below.
Scoring
Stretch marker tape across the throwing area at 5m, 10m, 15m, 20m and 25m from the throwing line. Each child has one practice and two further measured throws. Each child’s furthers throw is awarded points and recorded.
25m or better 5 points
20m or better 4 points
15m or better 3 points
10m or better 2 points
5m or better 1 point
Health and Safety points
Students should be positioned a minimum of 2m apart. They should be told only to throw on the instruction of the teacher. If the vortex is not caught they should be instructed that they must only get the vortex on the instruction ‘retrieve’.